Note: Words that are highlighted – and a different color than the general text of the blog provide a link that will take you to more information on what is mentioned. Clicking on the highlighted – “Bruce got…” just below, will take you to the previous blog – that opens in a new window. You can see “before” photos of work mentioned in this blog. Please enjoy the links.
My last blog mentioned rain. We had plenty more rain after that, but the work finally got done.
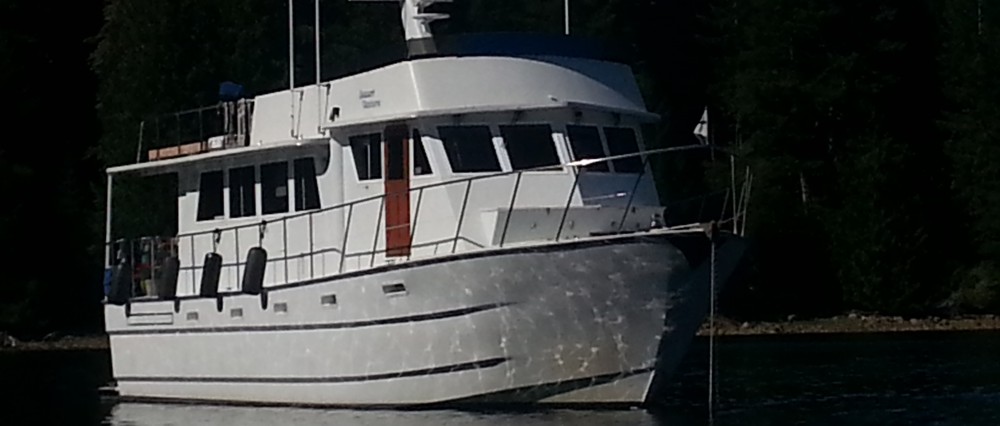
Swim Platform Fender
While we waited on the rain and boat yard, Bruce continued to work through his list.
We all needed dry weather, though, to get the work done. The big outdoor job for us was putting the swim platform fender back on. Bruce got the area prepped earlier, as mentioned in the last blog. Then it was a major push, with both of us working to get the fender on in a single day. We needed to get it done on a dry day, and the job had to be done so we wouldn’t interfere with the yard work that still needed done on the hull and running gear.
This is not an easy job. The fender is awkward due to size, and it is heavy due to material. We realized we were going to need more than the two of us, so we recruited some scaffolding. The scaffold helped hold the fender up high, which allowed me to help position the fender so that Bruce could attach it to the rim. It took all day- no breaks allowed. But, I can say – with all confidence, that the job was done better than ever before. I should say – as well as it can be – at least for another couple weeks. The final step is to cosmetically clean up the platform edge where the black ran on to the platform, that can’t be cleaned until the three week curing period is complete.

The fender is made up of two side pieces, one long piece across the width of the platform and four connecting pieces. The black stuff – single part poly sulfide – is seriously nasty but will protect the entire perimeter of the fender. We should have a dry surface between the boat and the fender for some time to come.

No matter how tall and narrow I cooked this photo, I still look like the Goodyear Blimp! Yes, this is me modeling the latest in boat yard wear. Only stylish in the boat yard – but, I didn’t get black all over me. Of course, I wouldn’t anyway – I am way too neat and tidy. However, the same can’t be said for the captain. Though I pleaded for him to get decked out in a white suit like the other boat yard hands wear, he said he didn’t need it. Well, maybe, but his best old work pants can’t say the same.

These photos were taken early in the day – his coat was sacrificed to the job, and those pants? They will never be the same. And so it goes with nasty jobs in the boat world.
The serious work was scheduled on when the yard thought we might launch, and all that was based on when the propellers would return to the yard from the prop shop. That took almost two more weeks from the time of the last blog! When the shafts showed up that gave us hope that the job would soon be done.
Shaft and Drip-less Shaft Seal

The shafts arrived, and then the cutlass bearings were installed. I couldn’t get into the engine room to show you the new cutlass bearings installed on the shaft, but I can show you the shaft, with the new bearings hidden by the new dripless packing gland. It is all very pretty.
High Energy Martyr Aluminum Anodes
Somewhere along the line there was a half day of no rain and the painters got the second coat of bottom paint on the water line, then a couple days later another full coat on the entire hull. Once that was done Bruce got under the boat, did additional cleaning on the thru-hulls, painted them, and installed the new high energy Martyr Aluminum Anodes.

The anodes were installed on the main (underwater body) arrays – on both starboard and port sides.

Transom Anodes
Transom (stern) arrays.

Zinc on Bow Thruster
A new zinc was installed on the bow thruster, too.
One of the cool things about boat yards is that, for a brief period of time, you get to see all the new and shiny things that go on the boat!
The anodes are our protection against corrosion. Aluminum boats have one major enemy – corrosion, and our Electro Guard System protects us successfully with the anodes. Proof comes each time we haul out and there is no corrosion to deal with. The anodes “die” to save the hull. We replace the anodes every ten to eleven months. This means our hull is solid and has full integrity. The bow thruster zinc gets replaced about every five to six months.
Alignment
Once the shafts were back and the cutlass bearings and dripless packing glands installed there was one job left – the most technical and critical aspect of this entire job. The alignment of the drive shaft and the transmission. This is so critical to the successful running of the engines that Bruce sweated the entire boat yard period, worried that the yard might not understand or be able to align within proper limits. Recall that we have “V” drives. This means that the alignment is done by adjusting the position of the transmission – not the engine. Less complicated than moving an engine, it is still no less a tricky process. Bruce removed even more obstacles for the mechanics, to make their work less cumbersome – and hopefully easier and faster. For me, just thinking about them unbolting the transmission was scary.

The general rule of thumb is that the alignment must be within .001 inch for every 1 inch of shaft to transmission flange diameter. In DESERT VENTURE’S case, our flange diameter is 5 inches, therefore the alignment must be within .005. Our guys did even better getting the port side within .002, and the starboard side within .003. They connected the shaft flange to transmission output flange. Needless to say, the yard was up to the task of the job. Bruce did his own measuring to confirm – after all – these are our engines.
Propeller and Rudders

And, finally! Our propeller was delivered – a gorgeous stainless steel propeller! It was installed soon after arrival. This yard period was the first time we tuned the prop. Mentioned in the last blog, I wondered if our props were out of tune, creating a high pitched sound that scares away sea life. The final results of the propeller shop’s analysis were that the props were in need of adjustment. Now, we wait to see if it makes a difference out on the ocean. Seriously though, having tuned props is important for many reasons – less vibration, better fuel economy, and more even wear on the cutlass bearings.
A few days before launch our rudders were returned to the boat ready for barrier and bottom paint. The rudders got their last coat of bottom paint the day of launch. Here they are all cleaned and properly finished with three coats of bottom paint. Nice!

Notice the flare on the end of the rudder. It assists the turning force the rudder.

Propellers are works of art. They are handsome enough to put on a wall as decor – and sometimes are. You just have to get in the right pub or yacht club to see them. The bronze prop, above, was installed on the boat next to us. It is significantly bigger, with an additional blade. Art in design and purpose.
Splash!
And yes, this all leads up to the finale – launch time.

No, we don’t splash. The boat is gently set down in the water.
With the running gear the major job of the yard period, the main mechanic and Bruce rushed aboard. They looked for water intrusion and checked the work. The packing glands were purged of air, and any particulate was flushed from the shaft tube. Bruce also turned on the Electro Guard system and purged the two main engine sea strainers of air.
Purging the packing glands does allow a little water into the boat and that is expected. All in all everything looked good. Bruce started the engines. They purred – so happy to be back where they belong – me too. The boat yard guys gently walked the boat out beyond the lift, and we took control of the boat. We took an extended cruise – a sea trial of sorts – sea time that seasons the equipment. We need a little more underway time to get the glands perfectly adjusted. We know that will happen soon.
The good news is the boat yard work is done. The really good news is we are back in the water. And the super really good news is we will be underway and voyaging in the next month and a half.
Meanwhile we are home today cleaning up from the boat yard period.

Angie, I thank you for this blog. Good to see you “The Captain” and hear about all the great adventures. I do miss working for and with Bruce. Great man there, continue to take great care with him. He is a keeper (but you already know that). Tell him hello for me and enjoy the wonderful sea life. Have a great week and hope you had a glorious Easter. Dave Reed
WooHoo She is all beautiful again!!! Way to go. Can’t wait to hear where DV will take you next.
We are heading down to Astoria the end of April. Hard to believe it has been two years since we last saw DV at Walker Island as you were slipping the surly bonds of the Columbia River.
Dan
S/V Cinnamon
Still in Hayden Bay
What fun reading this. Brings me back. Wish I was still driving the “Mama Lou”.
Best to you guys.
Charley
Hey Buddy, been there, done that. She sure looks fine and so does the boat. You, my friend, stay away from me with those rubber gloves. How long was your yard period? Where are you off to next? Guess I’ll follow you on the blog. Aloha and smooth sailing.
Jean Louis
What great pictures and wonderful explanations of everything, Angie! Plus the pictures of you and Bruce are fantastic – looks like you both weathered this experience well! DV looks brand new! So shiny and fresh that you can almost see her smiling! Smooth sailing and good health to you both!